Using MPFB to Pose for Stable Diffusion
This is a tutorial on how to export OpenPose poses from MPFB and use them with automatic1111 (or ComfyUI or similar).
Important notice: At the time of writing this tutorial, the OpenPose functionality in MPFB is experimental
What you need
The first thing you need is Blender 4 with a version of MPFB built for Blender 4. The functionality has been in a usable state in the nightly builds since 2024-01-04. The alpha releases and the MPFB nighly builds for Blender 3.6 do not include the functionality described here.
Next you need a stable diffusion environment. The tutorial assumes that you already have a working setup with Automatic1111 and ControlNet, with the relevant OpenPose models. If not, please refer to Install Automatic1111 and ControlNet: A Complete Guide before continuing here.
In Blender, you need a character with the “default” (or “default no toes”) rig. Other rigs will not work, but it is allowed to enable helpers for the default rig.
Where to find the OpenPose export functionality
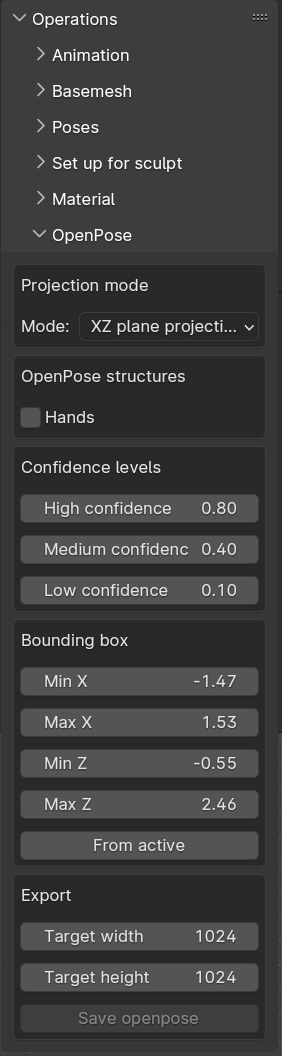
In Blender, you can find the OpenPose panel under “Operations”:

The different projection modes
There are two different modes for mapping the pose to the 2D space expected by OpenPose:
- XZ plane projection: Map exact coordinates from the frontal orthogonal view. That is -X world space is left, +Z world space is up.
- Perspective projection: Map approximate coordinates from the view of the camera. That is left in camera space is left in the result.
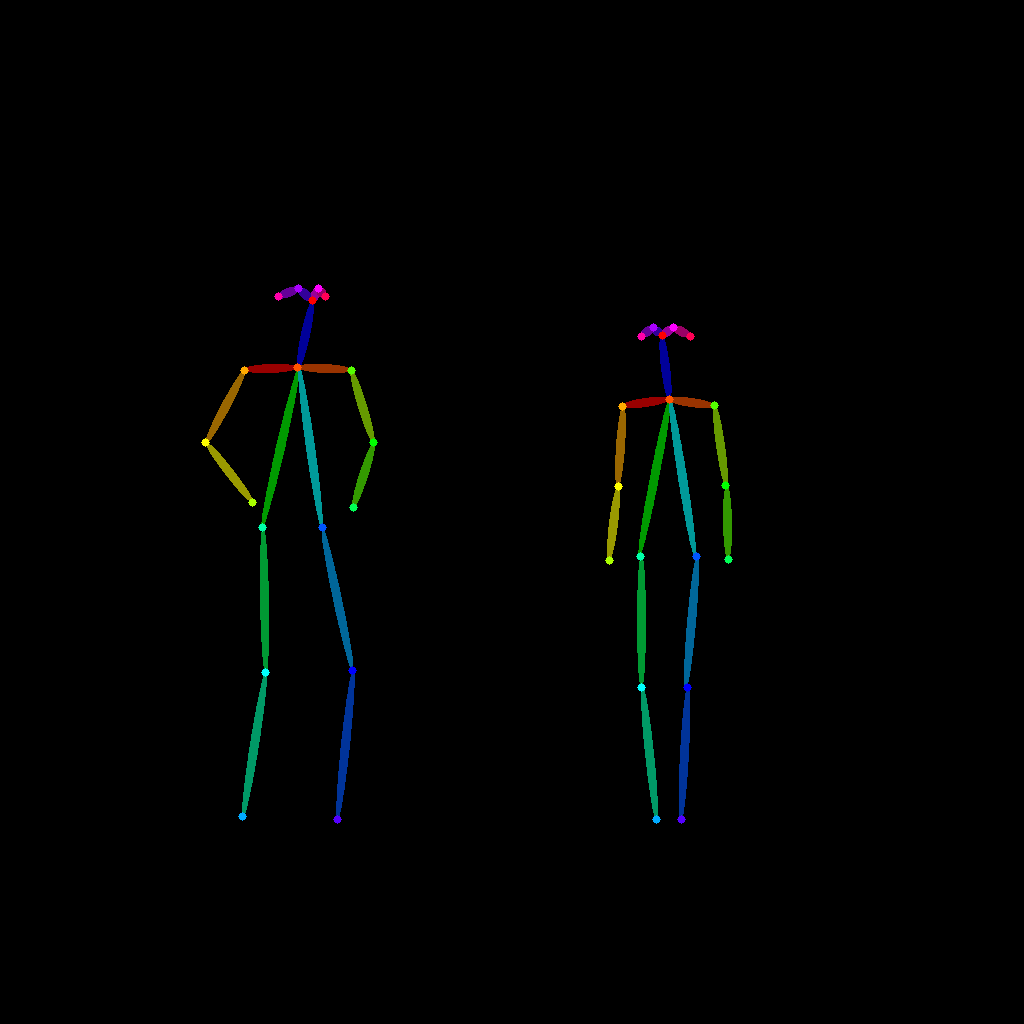
XZ plane projection
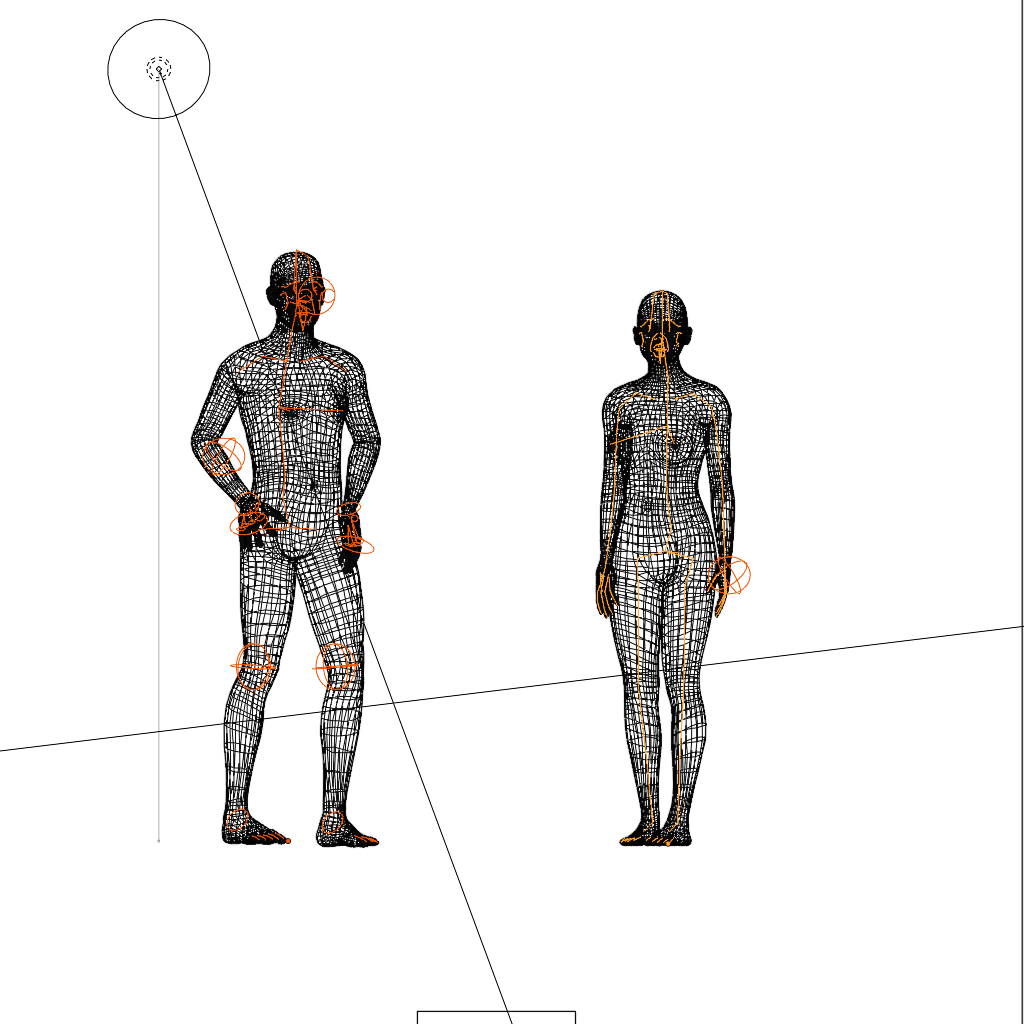
The recommended mode is XZ plane projection. This gives the most accurate results. In this mode, you get what you see in the frontal view:
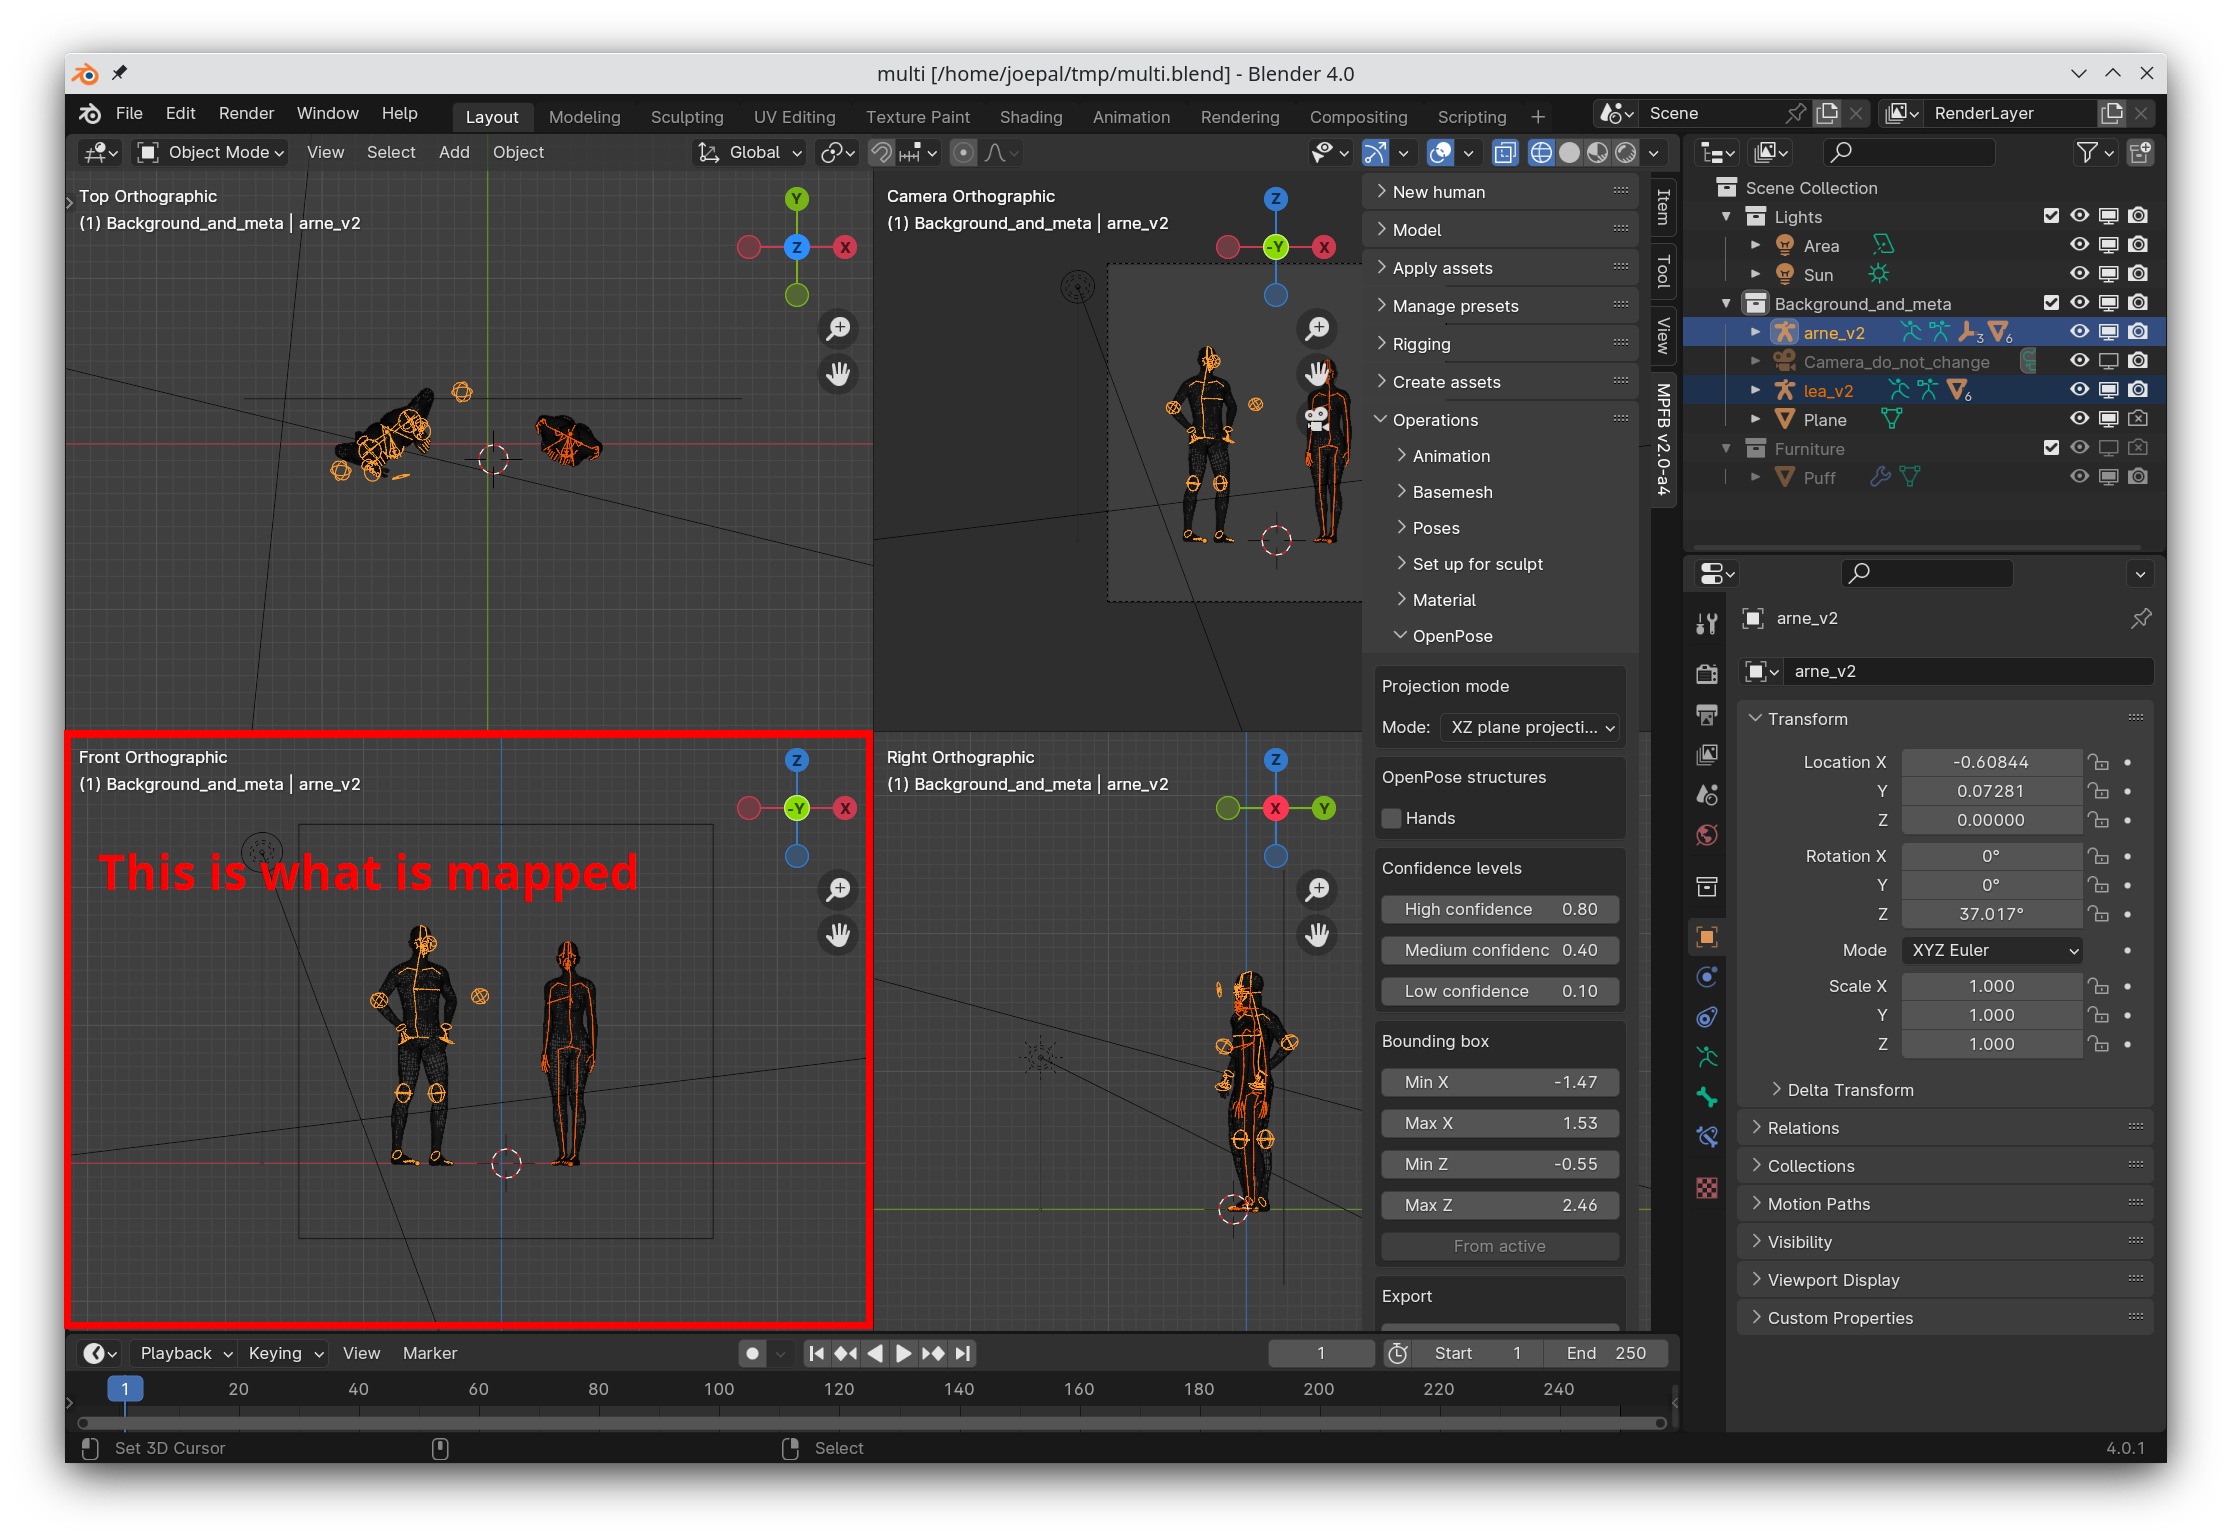
In the XZ view, you have to specify a bounding box and a target resolution.
The target width/height is how large the coordinate system is in the resulting OpenPose JSON file. Ideally this is the same as the image you intend to generate later on. That is, if you want to generate images which are 1024x1024, you should specify a width and height of 1024x1024 pixels.
The bounding box is the limits of what is mapped. That is, if you specify that minimum X is -0.5 and a bone in the armature is at position -0.8, then the bone will be outside the left edge of the image.
To help specify the bounding box, you can import world coordinates from an object. Easiest is if you put a plane in the scene and resize it to specify the edges of your intended scene:
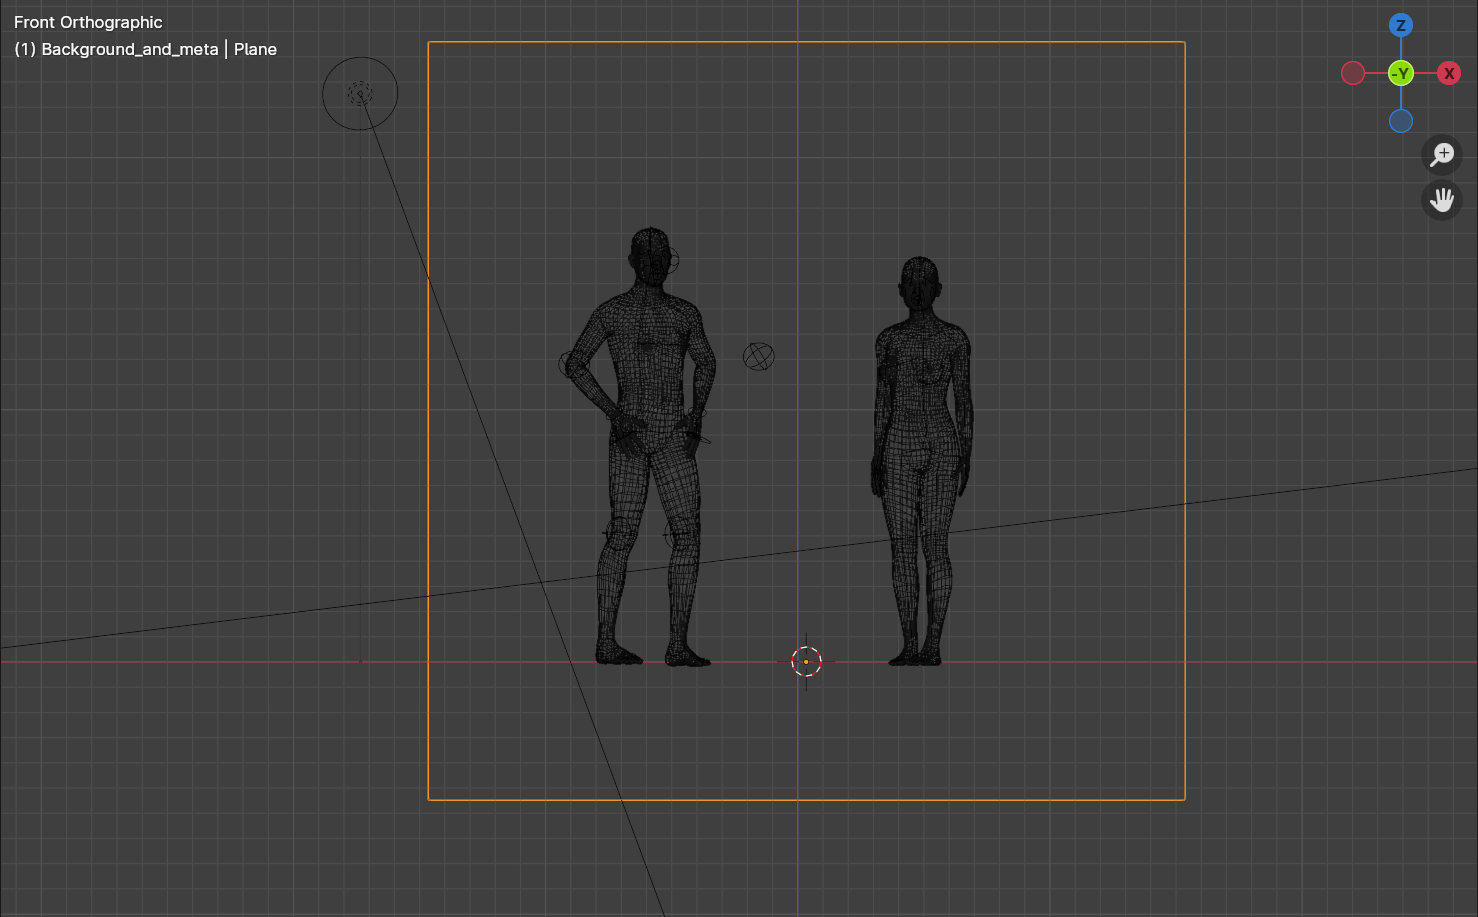
With the plane selected, you can click “from active” in the openpose settings to import its extreme coordinates as the bounding box.
In the bounding box, it is important that the ratio is the same as the target resolution. That is, you want a 1024x1024 image, your bounding box should have a 1:1 ration between X and Z. Otherwise the export will be distorted.
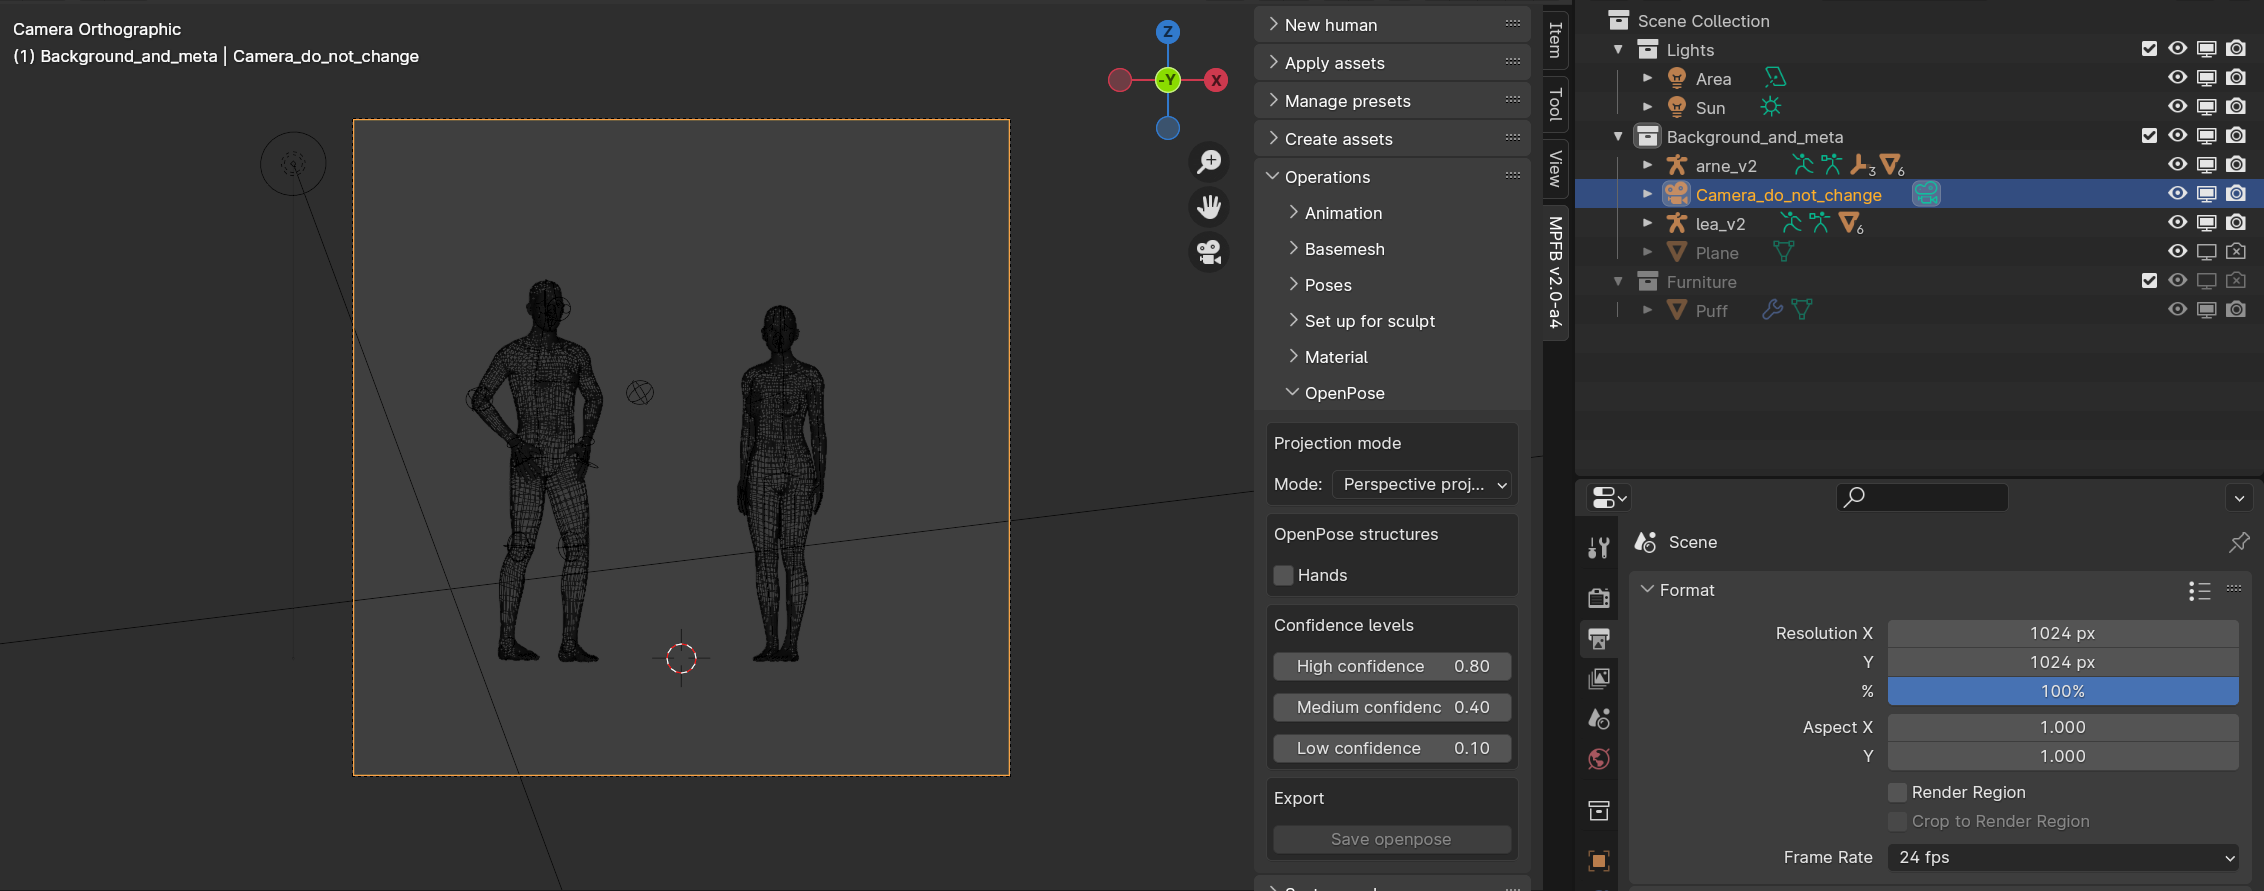
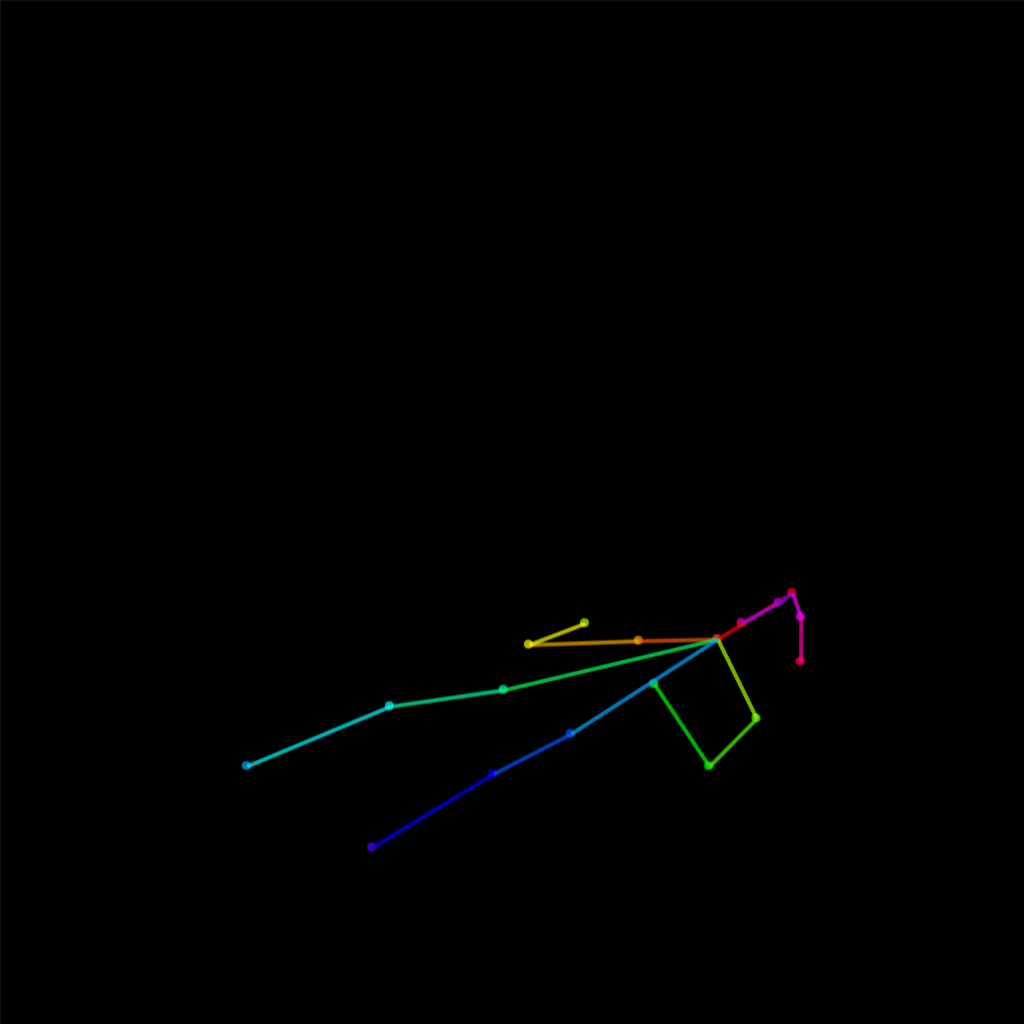
Perspective projection
The alternative to XZ is to map the view of the camera to the export. Unfortunately, this does not provide exact results, as the relevant API call in blender, bpy_extras.object_utils.world_to_camera_view(), does not really return what the camera sees in a render. It does not take lens distortion etc into account. Thus, the end result will often look slightly off compared to what would have been expected.
This said, it is a convenient approach to set up a scene. And if it works, it works.
Contrary to the XZ approach, you specify the resolution as you would have done for a render. The bounding box is automatically calculated from the camera view.
General settings
Independently of which projection you use, you can specify whether you also want to export hand coordinates, and what confidence values you want to use.
The hands checkbox control whether to include hand coordinates at all. If unchecked, the hand_left_keypoints_2d and the hand_right_keypoints_2d arrays will be left empty in the JSON export.
The confidence levels control how sure you want MPFB to say it is in the export. Coordinates in OpenPose are assumed to have been interpreted from an image, with varying levels of confidence. If a coordinate is hard to guess, a low value will be used. If a coordinate is almost certain to be correct, a high value will be used.
In MPFBs mapping algorithm, different approaches are used for finding coordinates. Some are exact bone locations, which are considered having “high” confidence. Some are exact vertex positions, but nevertheless on a surface rather than where a bone would be. These are considered to be of “medium” confidence. Finally, there are positions which are interpolated between multiple vertices. These are considered to be of “low” confidence.
There’s no exact science to the confidence levels. You’ll have to play around with the settings to see what works for your particular image.
Exporting
To export, select one or multiple armature(s). Nothing other than armatures should be selected.
There is no known limit to how many armatures you can have in the scene.
When ready, click the “export” button and save the JSON file somewhere.
Importing the JSON file in automatic1111
In your favorite stable diffusion UI, find the ControlNet settings:
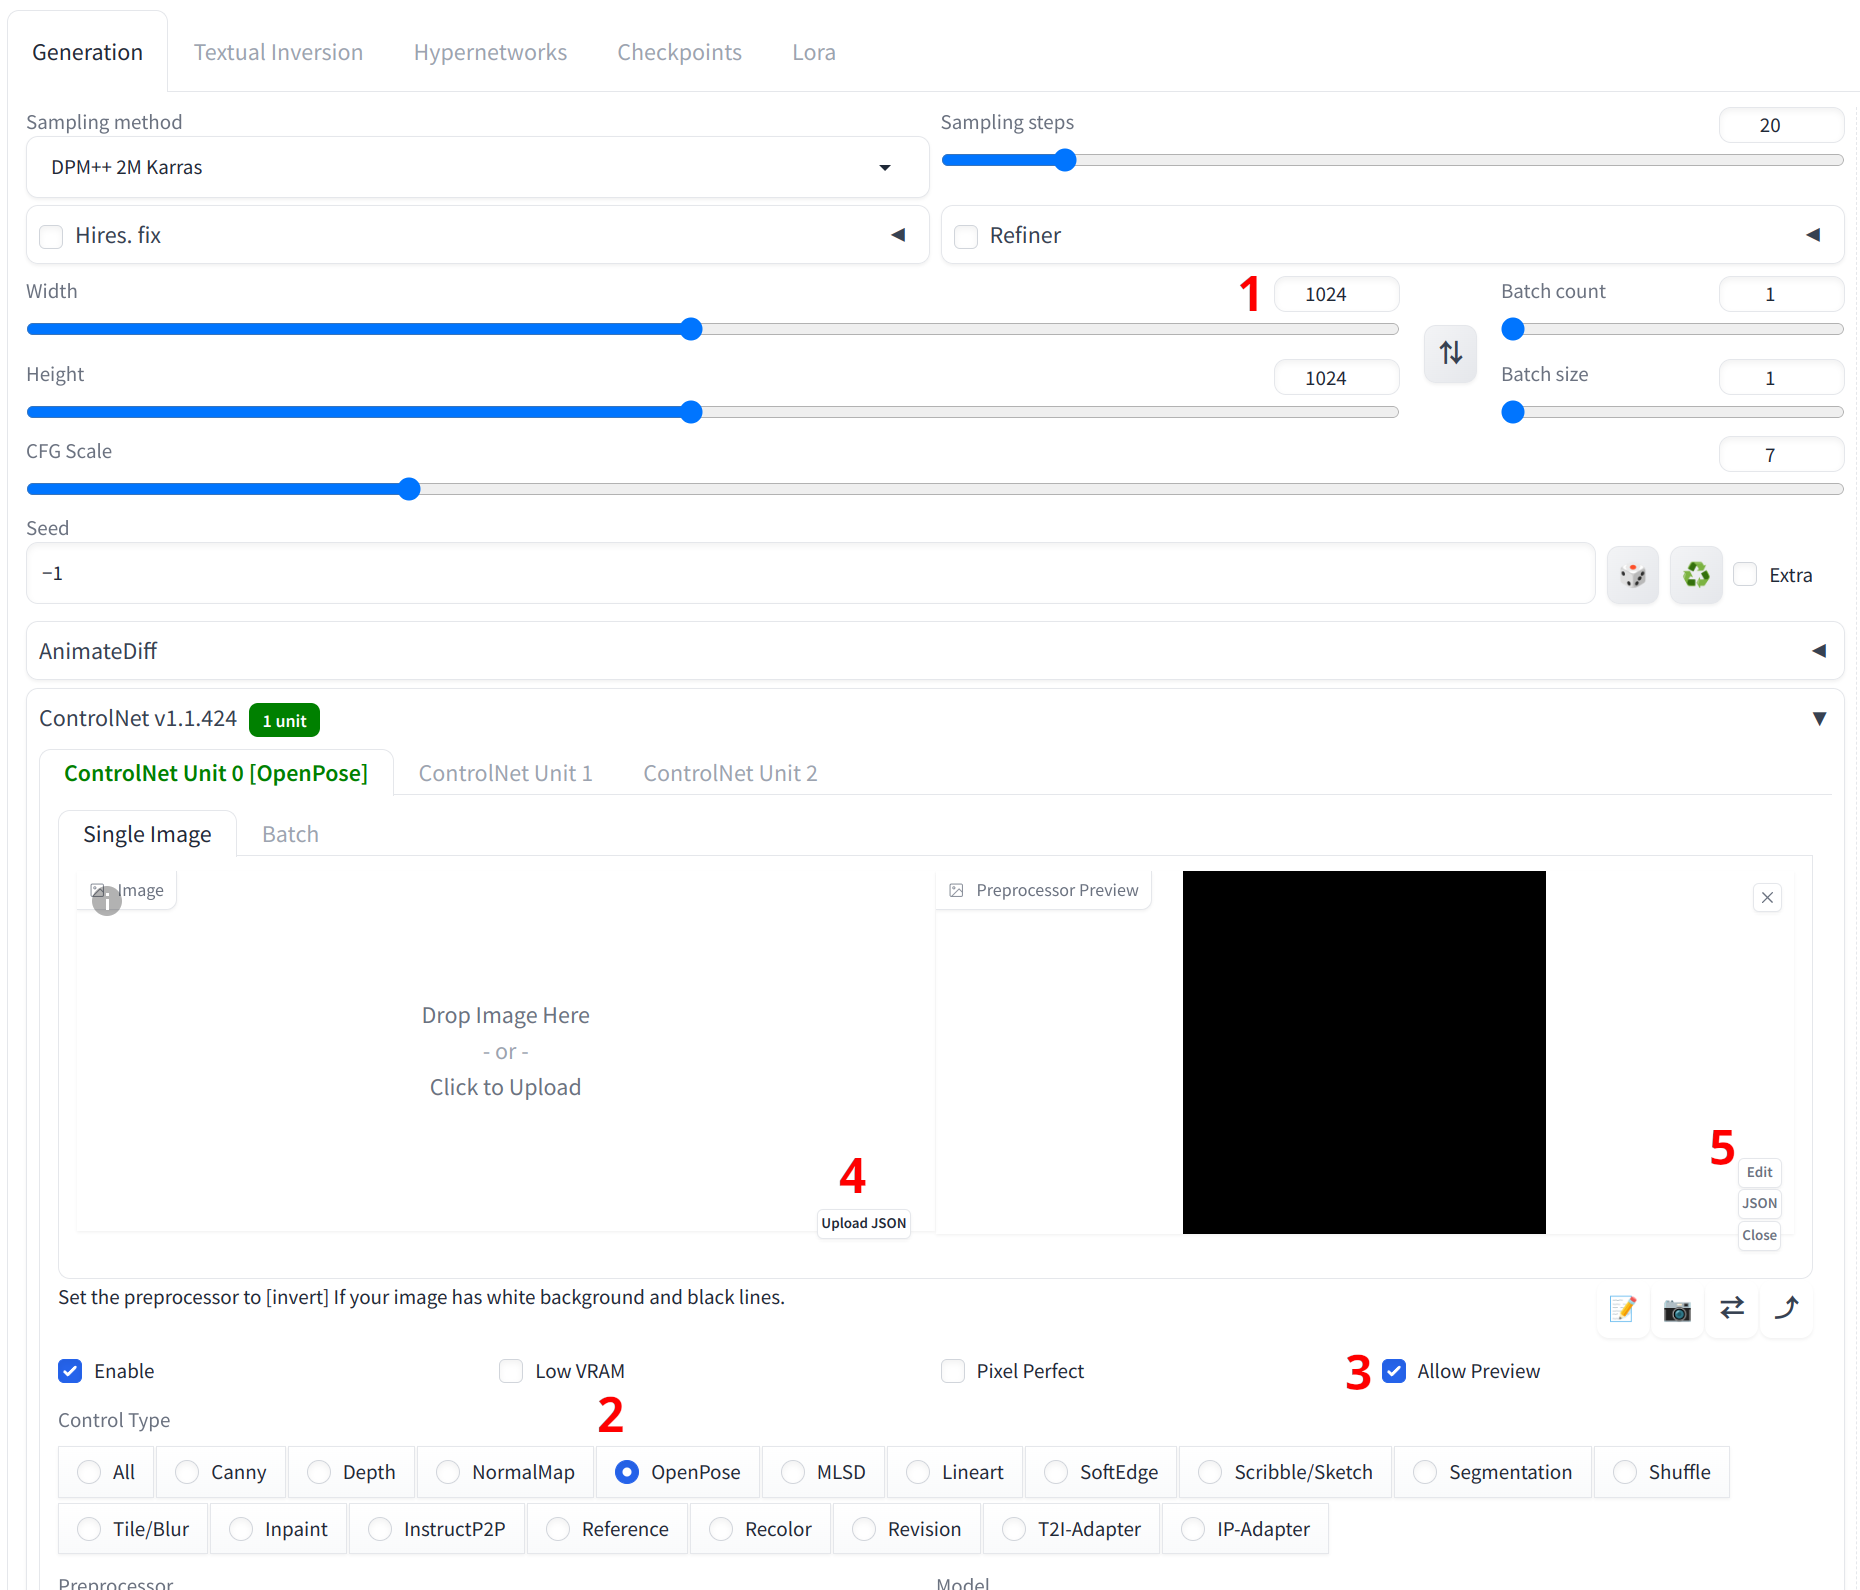
Then do the following:
- Specify the resolution. This should be the same as the resolution you exported in. In theory you can use a different resolution, but in my experience especially the face will be distorted by this
- Enable the OpenPose controlnet module
- Enable preview of poses
- Upload the JSON file you exported from MPFB
- Click “edit”
After 4, you will see that the pose preview is still black. I’m assuming this is a bug, but luckily it is easy to work around. After having clicked “edit” (5), use the scroll wheel over the preview part of the pose editor, or expand a person. Then the pose should appear.
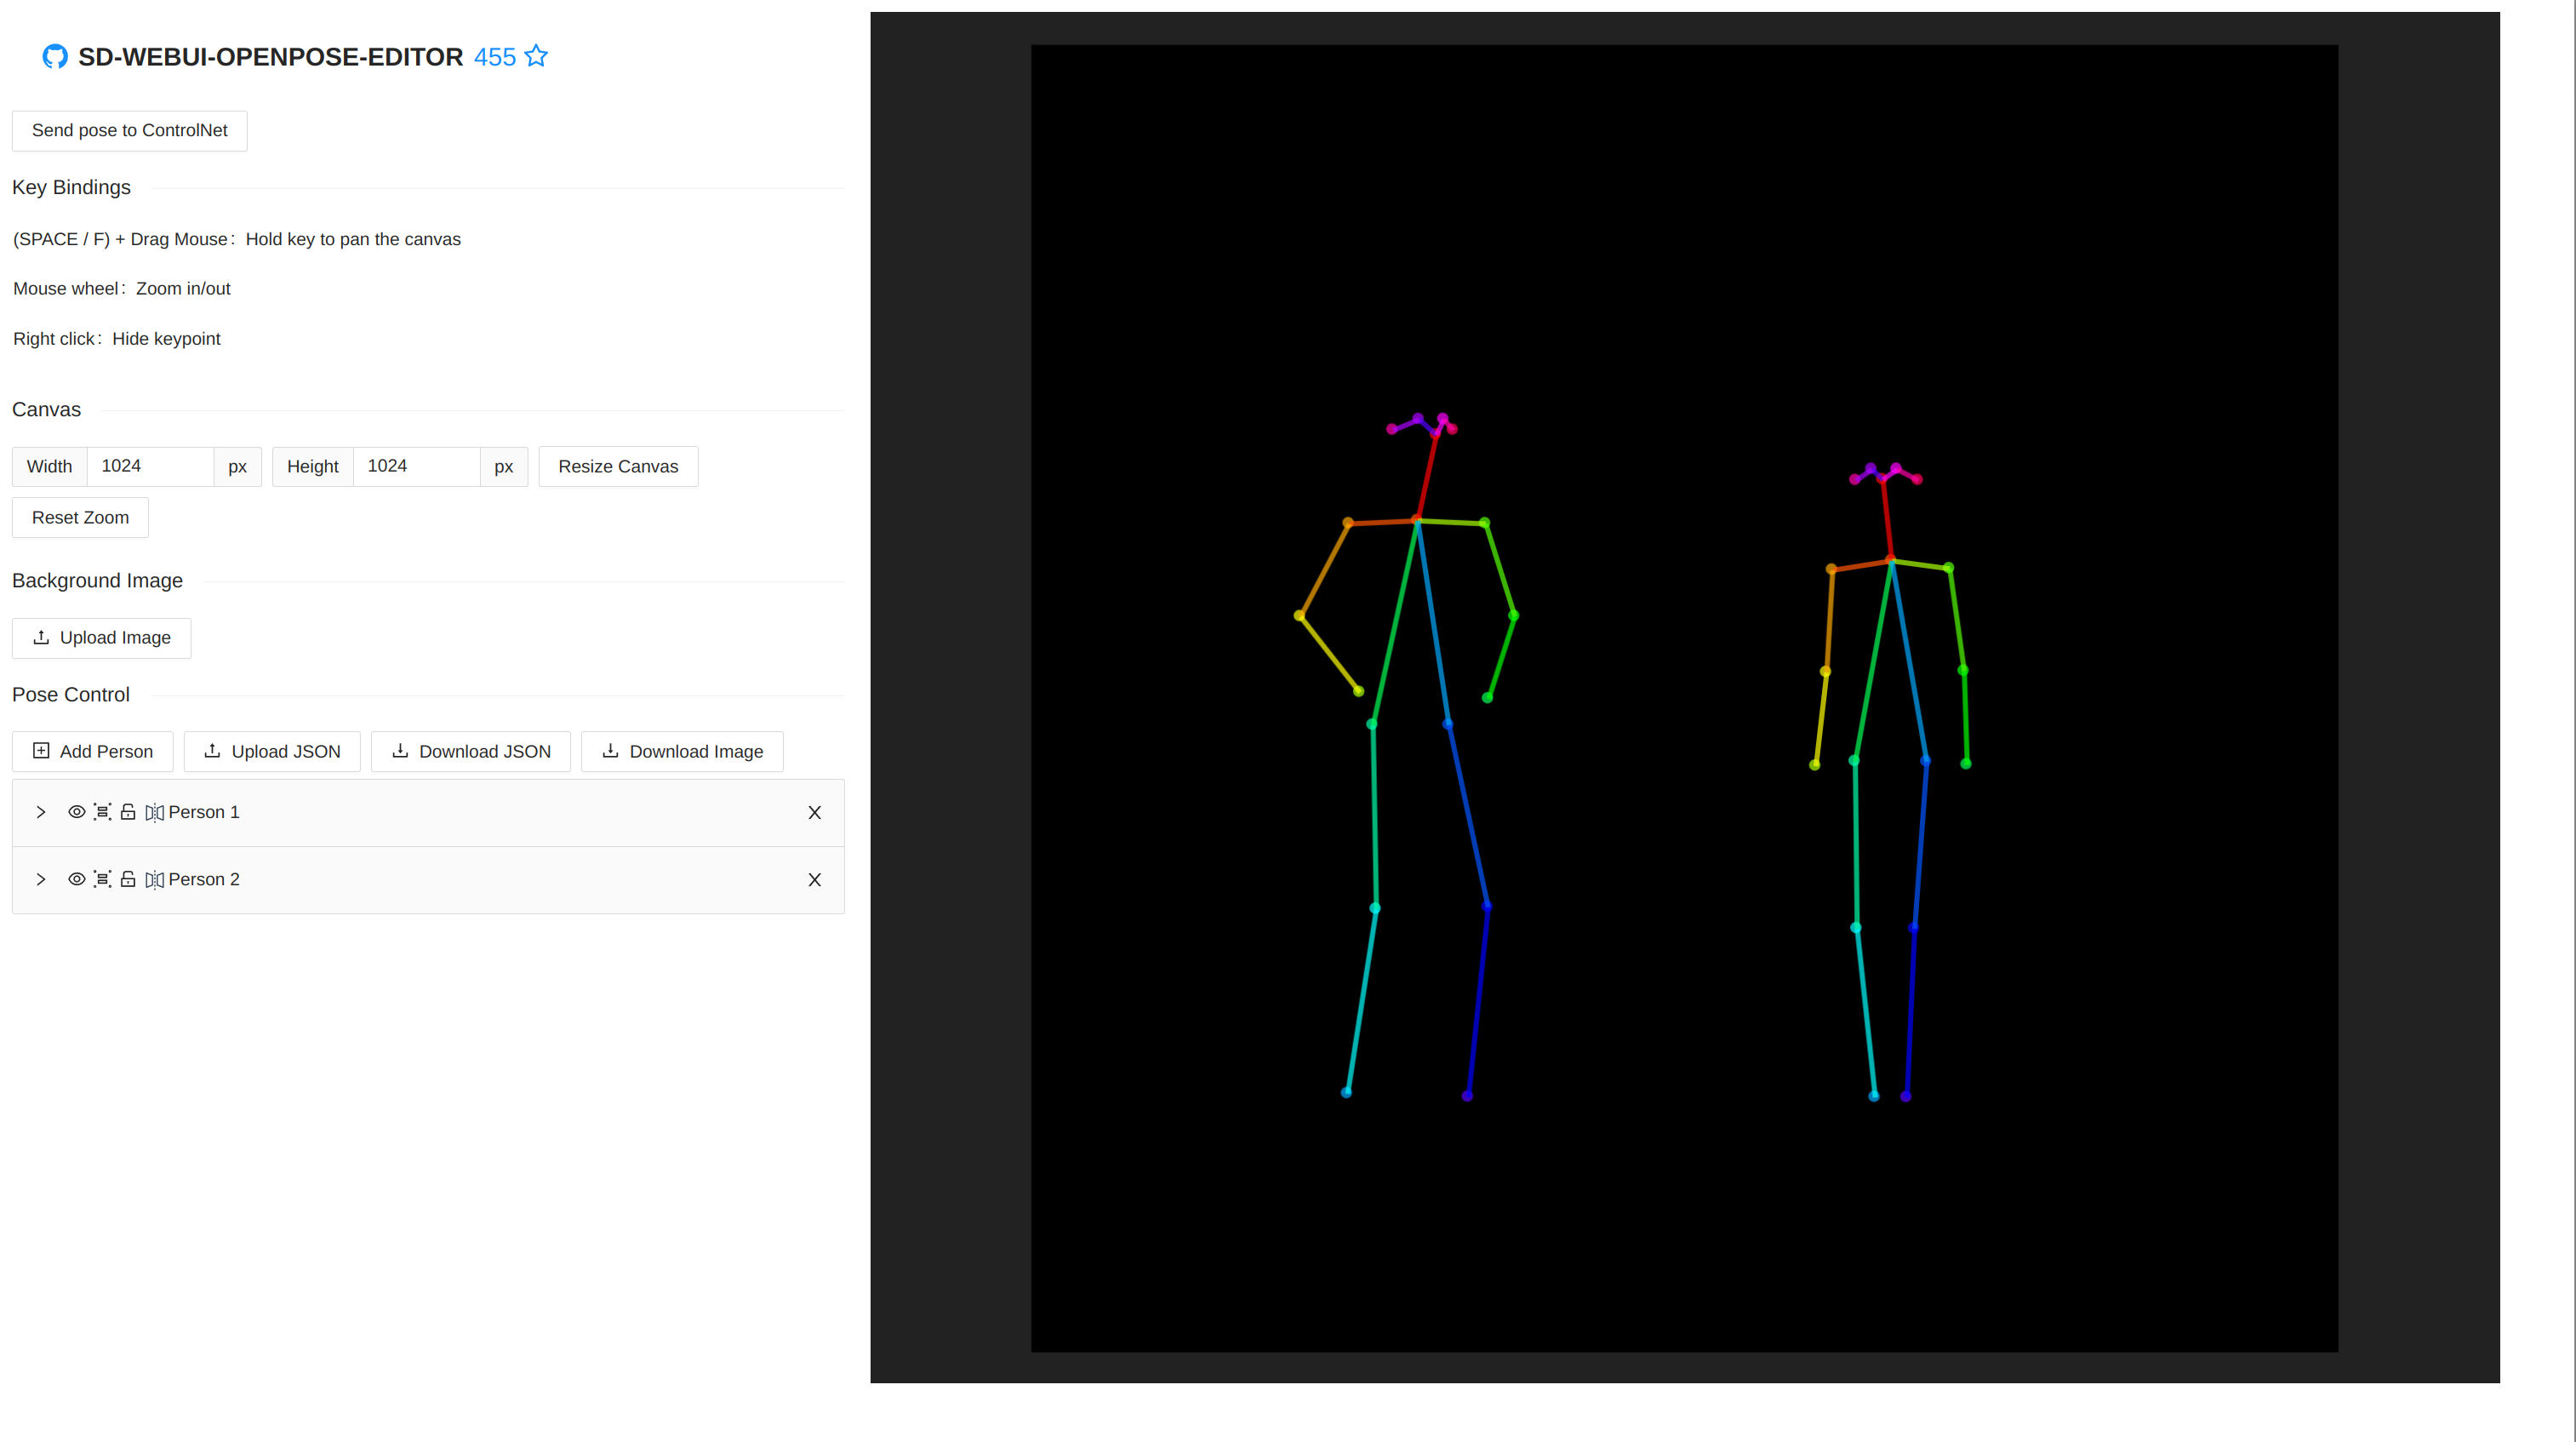
If you exported hand coordinates, you will need to expand the hands in the tree for them to show up.
Once the pose is visible, click “send pose to controlnet”. The pose should now be visible in the preview panel too, and you are ready to start prompting.
These are the full settings I used when generating the sample output:
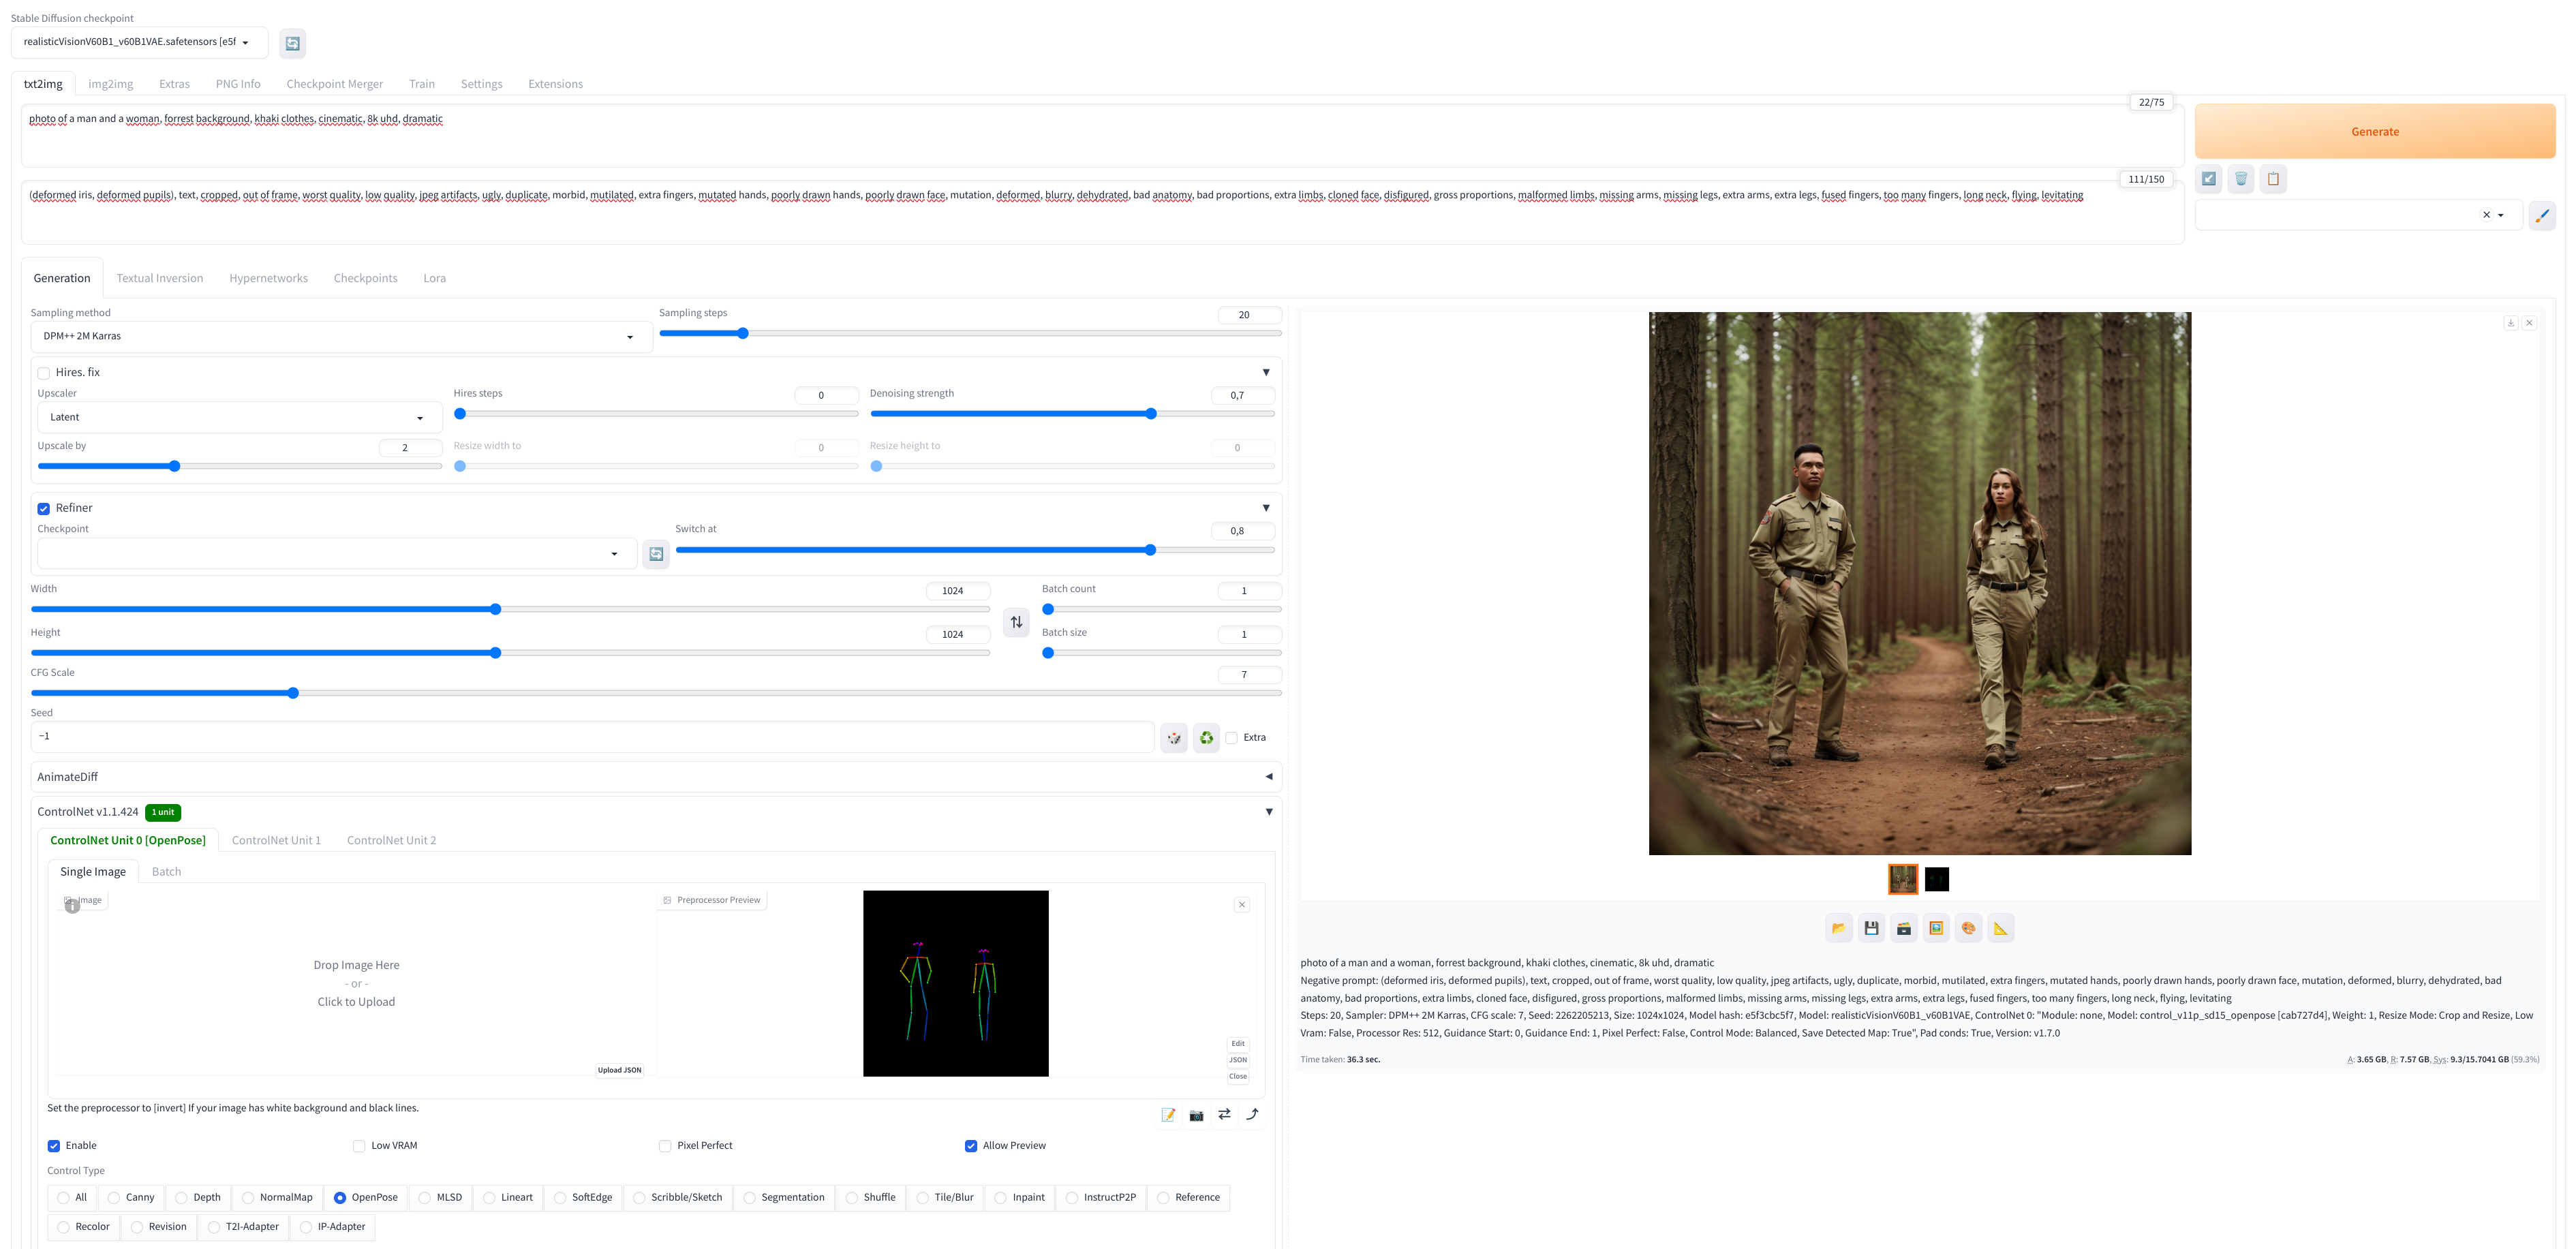
For reference the resulting pose image ended up being this:
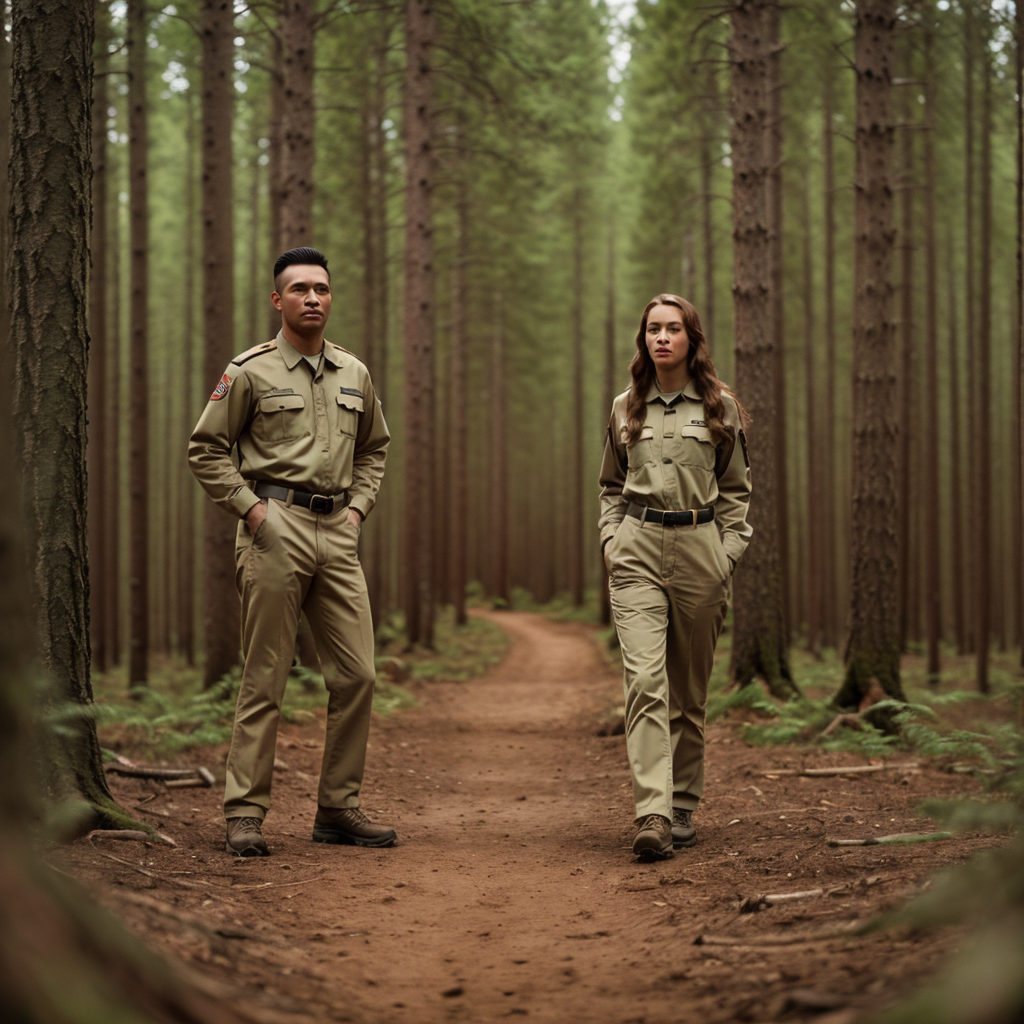
And the output image was this:
Limitations
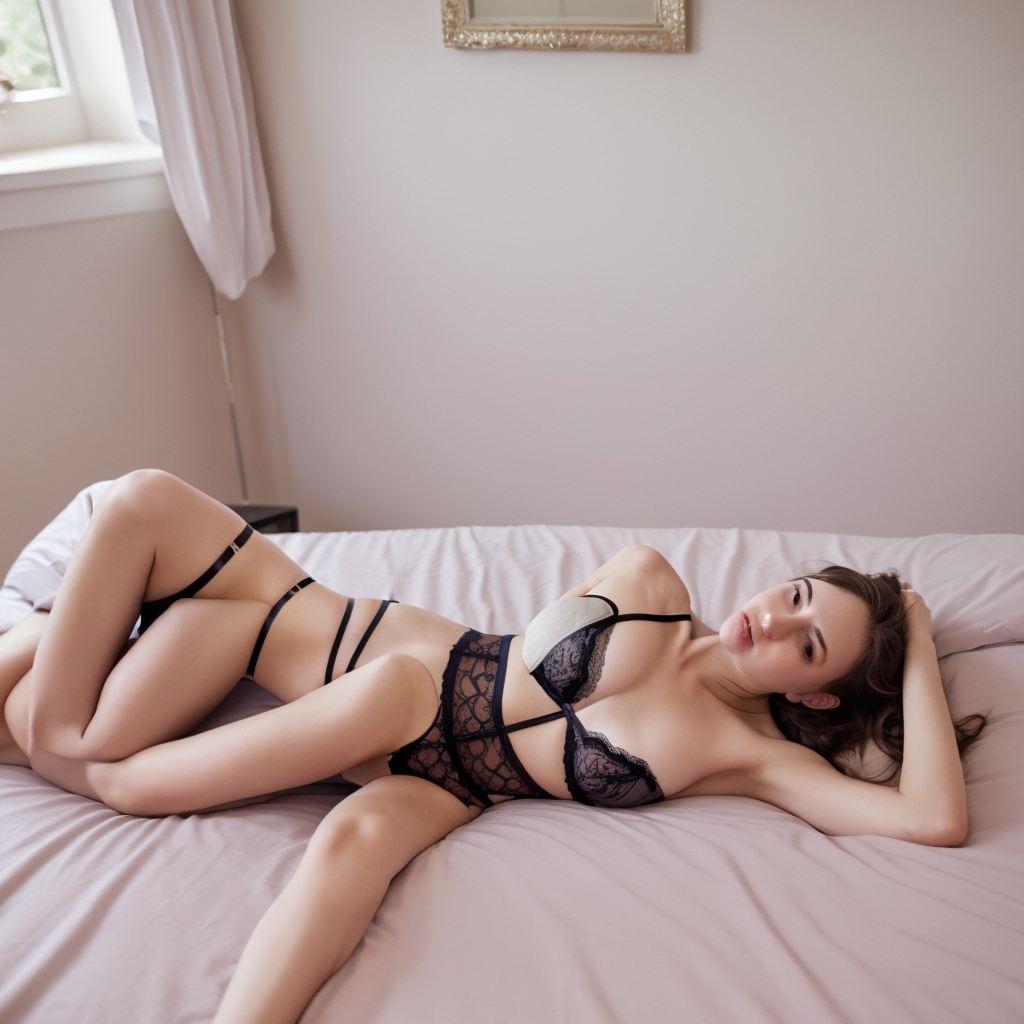
It should come as no surprise that limbs and faces end up being distorted in generated images. This is a general limitation for stable diffusion, with or without controlnet. However, this will be especially true if you use complicated poses which rely on understanding of depth, such as where some limbs cover other limbs. This is an attempt at creating an image of someone lying in a bed with their hands on their stomach:
You will get the best results when the person in the image is facing forward and is standing in a reasonably neutral pose.
Regarding support for OpenPose features, so far only COCO and hands are supported in 2D mode. Face will be hard to support as it is not open to coordinate space mapping. The face coordinates in an OpenPose JSON trace the outline of the face in an image rather than specifying where a point of a face is. That is, in one case a coordinate point might be the chin close to the nose and in another case the same point might be far back of cheek line.
3D coordinates and BODY_25 are on the todo list for experiments though.